If you love sunrise sand and salty air, you can ride the beach without wrecking your Fat Tire Electric Bike. The rule of thumb: rinse with fresh water ASAP, dry completely, and lube what moves. Do that, and corrosion stays manageable—even for regular coastal rides.
Quick answer on charging time: after a beach session, most 48V e-bike batteries take about 4–6 hours to fully charge with a 2–3A charger. Bigger packs (e.g., 48V/20Ah) on a 3A charger can need 7–8 hours. A simple estimate is: hours ≈ (battery Ah ÷ charger amps) × 1.1–1.2. Now, let’s make your post-ride routine bulletproof.
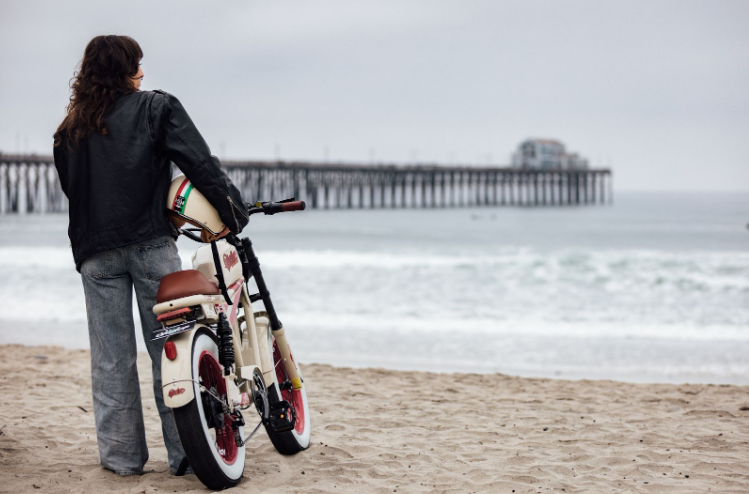
Why Beach Riding Loves a Fat Tire E-Bike
Fat tires “float” over soft sand because of the wide contact patch and lower pressure. For firm, packed sand, start around 12–15 psi; on softer sand, drop to 8–12 psi (lighter riders can go lower). Re-inflate to your normal street pressure before pavement miles to avoid squirmy handling and rim strikes. The bonus of a Fat Tire Electric Bike is how confidently it tracks across ruts, shells, and drift lines while keeping motor load reasonable at slower cadences.
Corrosion 101: Salt, Sand, and Time
Salt is hygroscopic—it traps moisture against metal and starts corrosion quickly. Sand is abrasive and migrates into chains, freewheels, brake pads, and bearings. Combine the two and waiting even “until tomorrow” after a ride is enough to start pitting. Your defense is speed (wash within 15–30 minutes), technique (low pressure, targeted cleaning), and protection (lubes and inhibitors).
Pre-Ride Prep That Prevents Rust
- Protect contact points. A thin smear of dielectric grease on battery terminals and light-duty connectors helps block moisture.
- Chain treatment. Use a wet-conditions lube or wax formulated for salt exposure. Apply the night before for best penetration.
- Fasteners check. Confirm key bolts (stem, seatpost clamp, rack) are snug. Stainless hardware and a touch of marine-grade grease on threads pay off long-term.
- Fenders & guards. Short mudflaps front and rear reduce spray toward the controller, display, and bottom bracket area.
- Carry a brush. A soft detailing brush or paintbrush flicks off dry sand before it can grind into parts.
Post-Ride Wash & Corrosion Control (Step-by-Step)
- Power down & remove the battery. Cover the exposed cradle with a dry cloth.
- Knock off dry sand first. Use a soft brush; don’t rub it in with a wet sponge yet.
- Rinse, don’t blast. Use a gentle hose or a bucket and cup. Avoid jet spray at the headset, hub bearings, motor axle, display, and controller ports.
- Soap wisely. Mild bike wash or a drop of pH-neutral dish soap in a bucket. Agitate with a soft sponge; use a separate brush for drivetrain.
- Optional salt neutralizer. A light pass of fresh water with 1–2% baking soda can help buffer leftover salt film. Rinse again with plain water.
- Dry completely. Microfiber towels plus gentle compressed air (or a small USB fan) get water out of crevices.
- Re-lube. Wipe the chain dry, drip lube on each roller, backpedal, and wipe off excess. Add a drop to pivot points (derailleur, kickstand).
- Corrosion inhibitor. A light spray on bare steel bolts, spoke heads, and inside the derailleur cage (keep off rotors and brake pads).
Battery Care & Charging After the Beach
Wipe before dock. Make sure the battery case and cradle are completely dry—especially around contacts—before reinstalling.
Let it acclimate. If the pack feels cool or damp, bring it indoors to room temperature before charging.
How long to fully charge?
- 48V/14Ah with a 3A charger: ~5–6 hours
- 48V/20Ah with a 3A charger: ~7–8 hours
- 52V systems often run similar times but may finish a touch faster on a 4A charger.Don’t charge when wet, and avoid leaving the pack at 100% for days. If you won’t ride soon, store at 50–80% in a cool, dry place.
Drivetrain, Brakes, and Bearings: What to Watch
Chain & cassette: Sand turns lube into grinding paste. After every coastal ride, clean and re-lube. If you hear crunching, clean again; don’t “ride it out.”
Brake rotors: Mist them with water during the wash, then wipe with isopropyl alcohol. Contaminated pads squeal—if that happens, scuff lightly with fine emery and re-bed on a quiet street.
Hub motors & mid-drives: Never submerge a hub past the axle line; avoid standing tide pools. For mid-drives, keep the lower chainring area extra clean—sand there accelerates wear.
Cables & housings: Full-length sealed housing resists grit intrusion. A few drops of light lube on exposed cable ends reduces corrosion.
Pro Setup for an Electric Off Road Bike at the Coast
- Tubeless tires (where rims allow) reduce pinch flats and let you run lower pressures confidently in soft sand.
- Stainless or e-coated chains last longer with good care; pair with a robust wet lube.
- Marine-grade grease on pedal threads, seatpost, and bottle-boss bolts helps future service.
- Spoke care: After rinsing, dry the spoke heads at the hub flanges—salt creep here is common.
- Water-resistant bags protect tools and your spare tube from salt mist.
Common Mistakes to Avoid
- Pressure washers. They force salt and water past seals into bearings and motor housings.
- Leaving salt overnight. Even one sleep cycle accelerates pitting. Wash the same day.
- Over-lubing. Thick films trap sand; wipe excess after every application.
- Forgetting the rotor wipe. Salt film on rotors leads to squeal and surface rust.
- Storing damp. A closed garage with ocean air still counts—use airflow and desiccant if needed.
Final Thoughts
Beach rides don’t have to be a “frame killer.” With a fast rinse, thorough dry, and smart lube routine, your Fat Tire Electric Bike will shrug off salt and sand while delivering the floaty traction that makes coastal cruising addictive. Keep your charging routine sensible—think 4–6 hours for typical packs, longer for high-capacity batteries—and your maintenance tight. Do that, and your beach-ready electric off road bike will stay smooth, silent, and rust-free all season long.